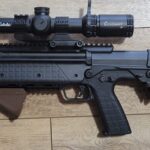
If you want the full Raven review, see this link. If you got a builder’s kit and want to know how it differs and what you’ll need, continue.

After reviewing a friend’s Raven 556 Platinum, I ordered a Gold Builders Kit. As others have noted, shipping times vary wildly: from 1 month to 5-6 depending what you order. Mine shipped 1 month after ordering. Note that what shows as “in stock” on the website may or may not be in stock.
The ordering process sucked and the kit is way overpriced BUT. . .yeah, this is the AR experience that Canadian AR owners have been waiting for. The build was super easy, aside from a few minor things:
What sucks on the Gold Builder’s kit:
- If you put the rear charging handle cover on, it blocks the bolt from removal, which basically adds a step every time you disassemble the gun. Looks better though. I might get and mod a rear charging handle in the future
- The mag release is really meant for an extended paddle, so it’s further forward than normal and shrouded by metal. (this kit comes with the mag release). If I get annoyed with it, I might dremel off that extra metal or mod my mag release with something.
- You can mod a standard AR bolt hold open (ping pong paddle) to work but you don’t get much working surface to use after
- The bolt hold open requires a screw style rather than a simple roll pin
- I had to lightly file the 90 degree shelf on the raven to get my bolt hold open to sit properly
- The side charging handle isn’t very big and doesn’t give a lot of clearance around the bolt hold open
- The Gold version is a terrible choice if you’re a leftie. Go Platinum for better controls


What’s good about the Gold builder’s kit
- It’s cheaper
- I don’t want a bunch of ambi controls in the way
- You still would need to purchase the rear charging handle from Lockhart or buy and mod a DPMS one to add to the Platinum version.
What you’ll need to finish your build:
BCG parts:
- Gas key
- Complete bolt with gas rings
Lower parts
- Grip (beavertail or non) & grip screw
- Buffer tube
- Buffer detent (retainer) and spring
- Castle Nut
- End plate
- Stock
- Buffer
- Recoil spring
- Safety
- Safety spring & detent
- Trigger
- Trigger pins
Upper parts
- Barrel & barrel nut
- Gas block
- Gas tube & pins
- Forend
- Muzzle device
Optional but recommended
- Bolt hold open (ping pong paddle)
- Bolt hold open spring & plunger
- Bolt hold open screw-pin thing (can’t use roll pin style)
Parts you won’t need from your donor AR:
- Trigger guard bottom (built in on the Raven)
- Firing pin and retaining cotter pin(comes with)
- BCG (but you’ll need to steal the gas key from it)
- Mag release (comes with)
- Charging handle (won’t fit anyways)
- Takedown pins (but consider getting the extended ones from Lockhart so takedown is easier)
- Takedown pin detents & springs

My build came in at 7.7lbs.
Parts choice notes:
18″ barrels are right on the edge between needing a mid length and rifle length gas system so if you go rifle length with an 18.5″, you may end up undergassed depending. This was an issue with some of the complete rifles.
If you want to go restricted barrel length, here are the steps:
Go to RCMP individual web services, log in, “Register Restricted Firearm”, start process, email pics to firearms lab, get gun to a verifier to sign off on it.
Make sure your stock & buffer tube size match. There are Milspec and Commercial sized buffer tubes and stocks to match. Mismatches either won’t fit or will be super loosey goosey.
Use a cassette-style drop-in trigger. They’re better and you deserve it. Triggertech has 3.5lb AR duty triggers for like $170.
While the rifle can accept regular grips or beavertail, get a beavertail style one.
Rear charging handles: you can get the LTAC standard one ($124), LTAC gen 2 charging handle ($190), or mod a Radian Raptor-LT for DPMS Gen2 AR10 ($150-200).


